前言
之前创建一键脚本安装专门爬取公网免费节点爬虫网站程序,由于没有伪装功能,暴露在互联网上很容易被墙/gfw嗅探识别,所以从安全性和功能的拓展性考虑,准备增加一定的安全保护功能:屏蔽国内所有IP访问,只允许国外的IP访问。 这是怎么做到的呢?一起学习吧!
搭建条件及思路
搭建条件
1,vps(弱鸡)一台,1核CPU;192M/512M内存均可;高性能大鸡也可以。
2,已经装好非域名一键脚本安装爬虫(没装点击安装);
搭建思路
这次使用geoip程序,通过它获取识别国内IP,通过nginx配置策略禁止访问。
由于前期一键脚本安装nginx并没有增加http_geoip2_module模块,所以需要重新下载相同版本的nginx,加载新模块http_geoip2_module一道编译生成新的nginx可执行程序,从而替换覆盖原程序,修改nginx相关配置即可实现。
为了能让小白搭建更容易理解,文中会在搭建步骤前加以描述。 下载配置geoip----->下载nginx源码和http_geoip2_module模块----->加载模块编译新的nginx---->替换原nginx/修改配置
搭建步骤
下载并配置geoip
geoip的作用:世界各地的互联网地址都是通过具体的IP访问,这些IP数据存在于geoip数据库中,使用它可以精确判断访问IP的位置。 这边使用geoip自动更新脚本实现安装,安装好处在于可以定时更新最新IP数据库,考虑零成本使用的是maxmind免费的IP库。 这边需要自行注册maxmind账户,以便下面脚本用到geoip; 其次获取LicenseKey如下图所示: 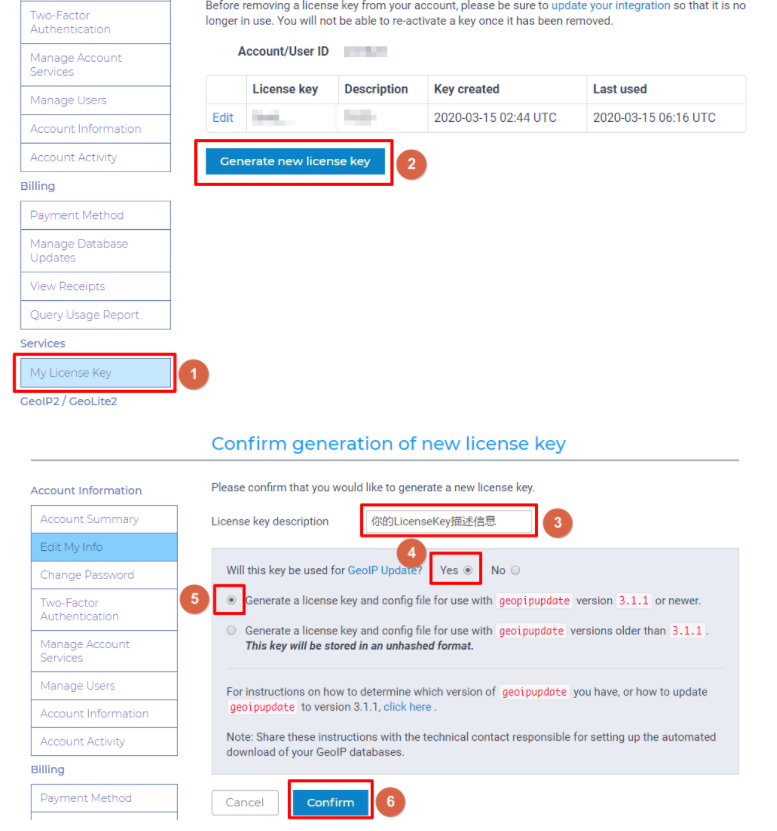 注意:这边使用高于3.1.1版本程序,区别方法:高版本的是以mmodb格式为后缀文件,低版本是dat文件后缀格式。用法略有不同。
这里以高于3.1.1版本程序为例 1.下载解压geoipupdate程序
wget https://github.com/maxmind/geoipupdate/releases/download/v4.2.2/geoipupdate\_4.2.2\_linux\_amd64.tar.gz
tar xf geoipupdate_4.2.2_linux_amd64.tar.gz
cd geoipupdate_4.2.2_linux_amd64/
mv GeoIP.conf /usr/local/etc/
mv geoipupdate /usr/local/bin/
2.编辑配置
vi /usr/local/etc/GeoIP.conf
AccountID 你的账户ID
LicenseKey 你的授权密钥
需要下载的ip库
EditionIDs GeoLite2-ASN GeoLite2-City GeoLite2-Country
下载ip库的保存路径
DatabaseDirectory /usr/local/share/GeoIP
3.创建并更新geoipupdate
mkdir -p /usr/local/share/GeoIP
执行更新程序
/usr/local/bin/geoipupdate
查看geoipupdate版本号
/usr/local/bin/geoipupdate -V
4.编辑定时更新geoipupdate
crontab -e
17 3 * * 3 /usr/local/bin/geoipupdate > /tmp/geoip.log 2>&1
安装好以后,执行geoipupdate命令获取GeoLite2-City.mmdb,GeoLite2-Country.mmdb。
下载nginx源码和http_geoip2_module模块
1.下载http_geoip2_module模块
cd ~
yum install libmaxminddb-devel -y
yum install -y git
git clone https://github.com/leev/ngx\_http\_geoip2\_module.git
mv ngx_http_geoip2_module/ /usr/local/
2.下载nginx源码
yum install gcc gcc-c++ -y
yum install -y pcre pcre-devel
yum install -y zlib zlib-devel
yum install -y openssl openssl-devel
wget http://nginx.org/download/nginx-1.20.2.tar.gz
tar -xvf nginx-1.20.2.tar.gz
加载模块编译生成新的nginx
cd nginx-1.20.2
./configure –prefix=/opt/demo –user=nginx –group=nginx –with-http_ssl_module –with-http_v2_module –with-stream_ssl_preread_module –with-threads –with-compat –with-debug –with-file-aio –add-module=/usr/local/ngx_http_geoip2_module –with-pcre –with-pcre-jit –with-stream_ssl_module –with-http_dav_module –with-http_degradation_module –with-http_flv_module –with-http_gunzip_module –with-http_gzip_static_module –with-http_random_index_module –with-http_realip_module –with-http_secure_link_module –with-http_slice_module –with-http_stub_status_module –with-http_sub_module –with-mail_ssl_module
make
make install
以上configure加载的参数根据需要增设,但必须增加ngx_http_geoip2_module一同编译,参数增设不合理会导致编译失败生成不完整程序(如:已安装过并配置过的路径不能重复,否则编译失败)。
替换原nginx并修改配置
#备份
cp /usr/sbin/nginx /usr/sbin/nginx_bak
#杀死nginx
pkill nginx
#用新的去覆盖旧的
cp /opt/demo/sbin/nginx /usr/sbin/
#启动nginx
systemctl start nginx
这样,通过nginx -V命令,即可查看nginx已加载的ngx_http_geoip2_module模块。
修改nginx配置
编辑打开nginx.conf vi /etc/nginx/nginx.conf,增加如下第21-29行代码
user nginx;
worker_processes 1;
error_log /var/log/nginx/error.log warn;
pid /var/run/nginx.pid;
events {
worker_connections 1024;
}
http {
include /etc/nginx/mime.types;
default_type application/octet-stream;
log_format main ‘$remote_addr - $remote_user [$time_local] “$request” ‘
‘$status $body_bytes_sent “$http_referer” ‘
‘“$http_user_agent” “$http_x_forwarded_for”‘;
access_log /var/log/nginx/access.log main;
error_log /var/log/nginx/error.log error;
sendfile on;
#tcp_nopush on;
keepalive_timeout 120;
client_max_body_size 20m;
#gzip on;
geoip2 /usr/local/share/GeoIP/GeoLite2-City.mmdb {
auto_reload 5m;
$geoip2_data_country_code country iso_code;
$city_name default=Beijing city names en;
}
map $geoip2_data_country_code $allowed_country {
default yes;
CN no;
}
include /etc/nginx/conf.d/*.conf;
}
代码意思:定义geoip2数据存储路径,以及变量。 编辑打开nginx.conf包含的子配置文件 vi /etc/nginx/conf.d/default.conf,增加如下第12-21行代码
server {
listen 80;
server_name 45.138.71.118;
root /usr/share/nginx/html;
index index.php index.html;
access_log /var/log/nginx/hostscube.log combined;
location ~ \.php$ {
fastcgi_pass 127.0.0.1:9000;
fastcgi_param SCRIPT_FILENAME $document_root$fastcgi_script_name;
include fastcgi_params;
}
location / {
if ($allowed_country = yes) {
proxy_pass http://127.0.0.1:12580;
}
}
location /myip {
  default\_type text/plain;
  return 200 "$remote\_addr $geoip2\_data\_country\_code $city\_name";
}
}
代码意思:只允许非国内IP访问反代爬虫网站,在网址后加入/myip回车,可显示当前访问IP及所属国家省份位置
修改网址默认首页
备份首页,同时下载新首页代码覆盖网站首页代码即可。
mv /usr/share/nginx/html/index.html /usr/share/nginx/html/index_bak.html
cd /usr/share/nginx/html/
wget https://raw.githubusercontent.com/lanhebe/proxypool/master/index.html
#nginx重新加载
nginx -s reload
自此,整个搭建已完毕。
实现效果
打开浏览器,在地址栏输入vps的IP回车即可看到如下效果。 1.国内IP禁止访问,和google一样伪装完美 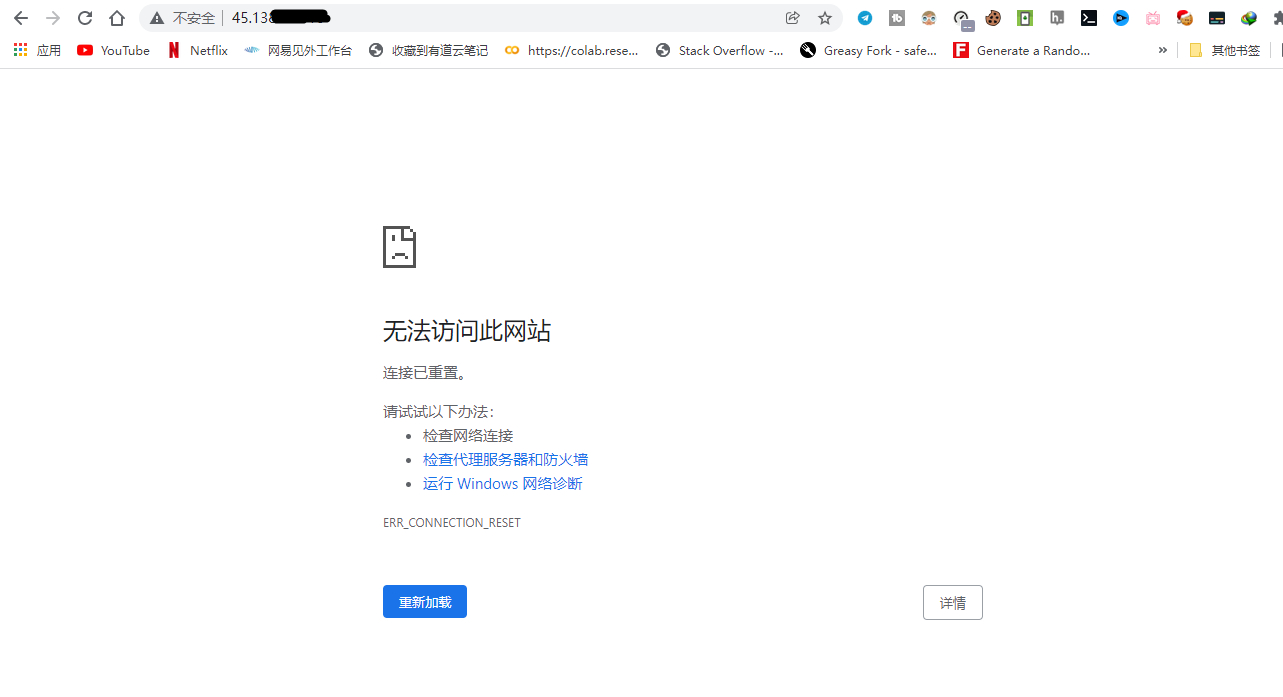 2.国外IP允许访问爬虫网站
 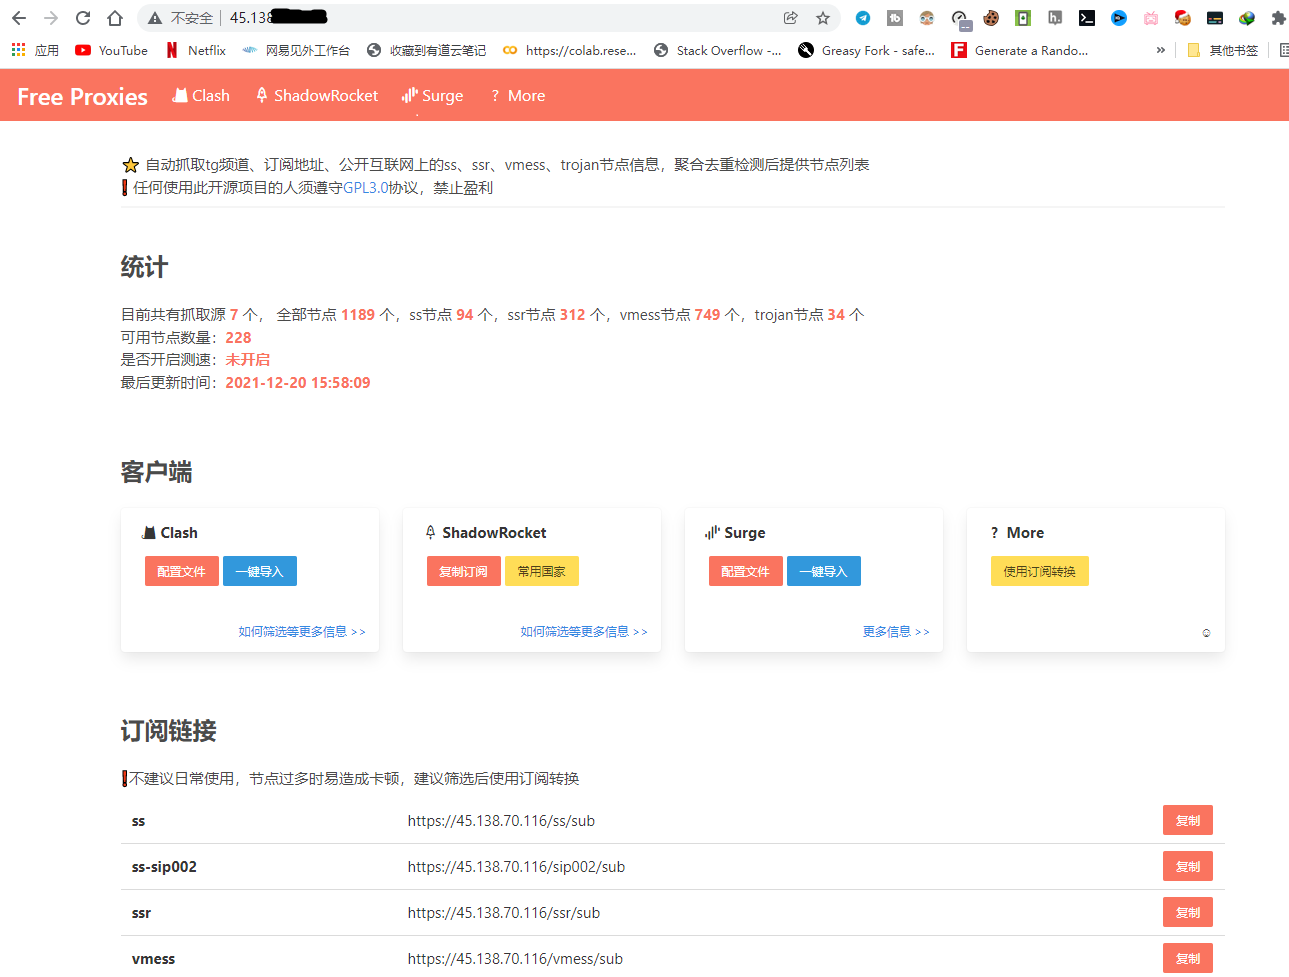 3.测试访问IP所在位置
后记
以上就是在nginx上增设安全策略功能实现的国内禁止访问,当然大家也可以根据自身需求**(如:只允许部分内部人访问等)**。
目前从我这里获取开源的爬虫网站部分已被禁止外界访问,只有我还在不断的贡献力量,写这篇博文也不容易,希望大家给予点赞或打赏下,谢谢各位。
问题反馈
经多次安装测试,以上安装是可行,唯一在测试中发现,有时会出现nginx.pid文件找不到,这时请复制pid文件到对应路径,即可刷新nginx最新配置。详见如下代码:
[root@C20220401154580 html]# nginx -s reload
nginx: [error] open() “/opt/demo/logs/nginx.pid” failed (2: No such file or directory)
[root@C20220401154580 html]# cp /var/run/nginx.pid /opt/demo/logs/
[root@C20220401154580 html]# nginx -s reload
参考网址
blog.leonshadow.com/763482/1983.html cloud.tencent.com/developer/article/1865759?from=article.detail.1050222 dev.maxmind.com/geoip/geolite2-free-geolocation-data?lang=en
转载请注明来源,欢迎指出任何有错误或不够清晰的表达。可以在下面评论区评论,也可以邮件至 lanhebe@gmail.com

